The Cross Fade
A.K.A. (also known as) the dissolve, cross-dissolve, or mix is a standard transition type within video editing packages.
Our team was recently asked for advice on the best way to add video transitions to an experience. Also recently, while I building an experience that utilized an Excel spreadsheet as a data source for multiple external video assets - I wondered - how could I smooth out the transitions between video changes and control the timing? Luckily, these events led me to build out the following cross fade experience.
While there may be no definitive ‘best way’ to do this within Composer - the downloadable file below should provide a good example of how to create this effect. Additionally, it uses a global variable to dynamically change the duration of the effect - for both the video transparency and audio volume. And finally, it uses a second, optional experience to select a video to play from a remote machine, through the use of local network triggers and the Call URL action. Basically, it acts as remote control!
Curious? Excellent!
Please download the files below from the following links:
- Download link 1 => Cross Fade Video Transition Experience
- Download link 2 => Remote Control Experience
Pictured below is the Cross Fade Experience open in Composer.
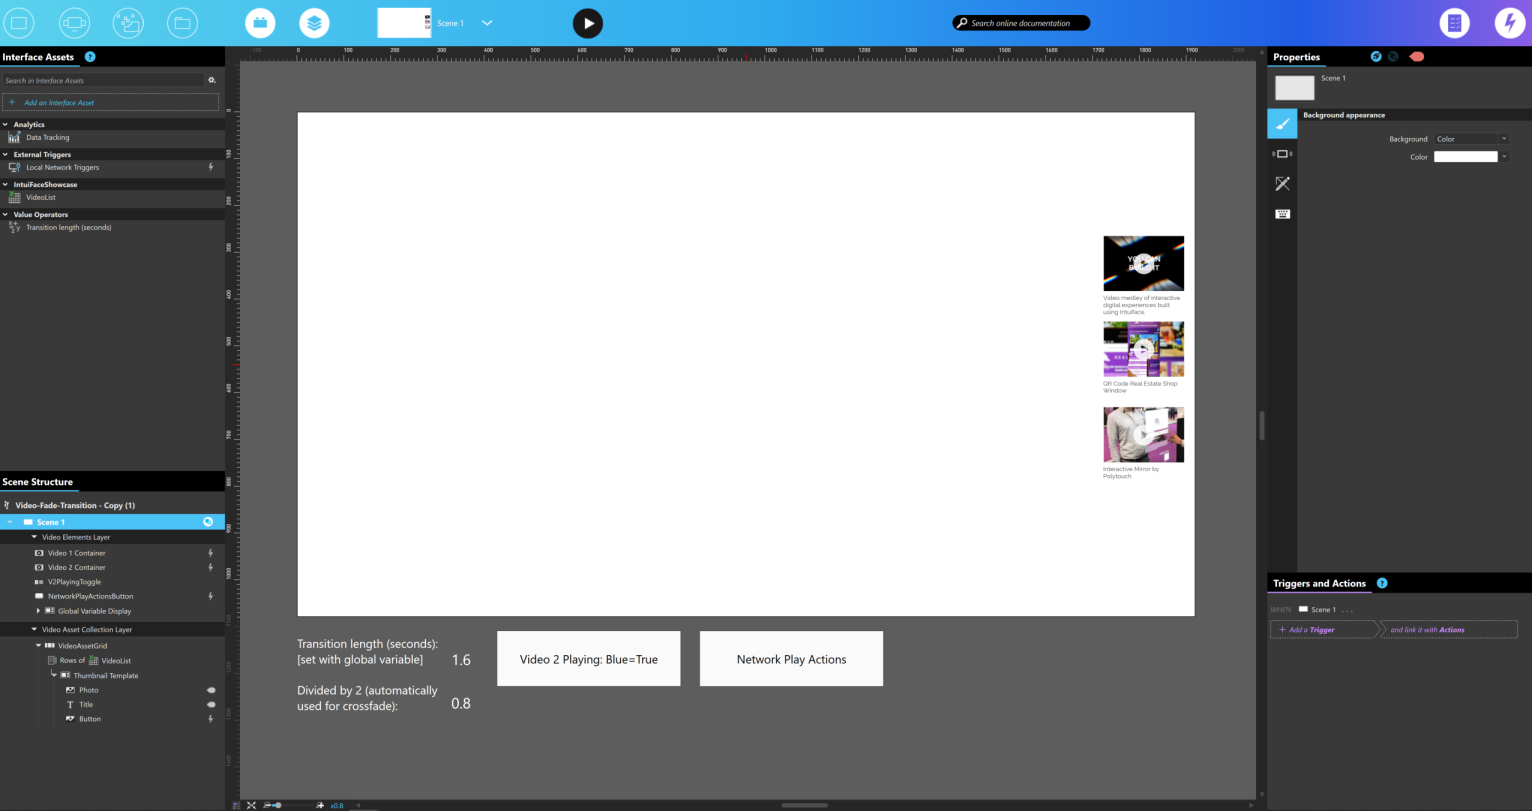
To begin, I’ll start off with a (somewhat skewed) illustration to try and visually explain what I am doing with the videos.

Layers
Put simply, I have two video asset containers, named ‘Video 1 Container’ and ‘Video 2 Container’ on the layer named ‘Video Elements Layer’.

When a user requests one of the videos from the available list by clicking on the button in the ‘VideoAssestGrid’ collection, the following actions with a condition occur.
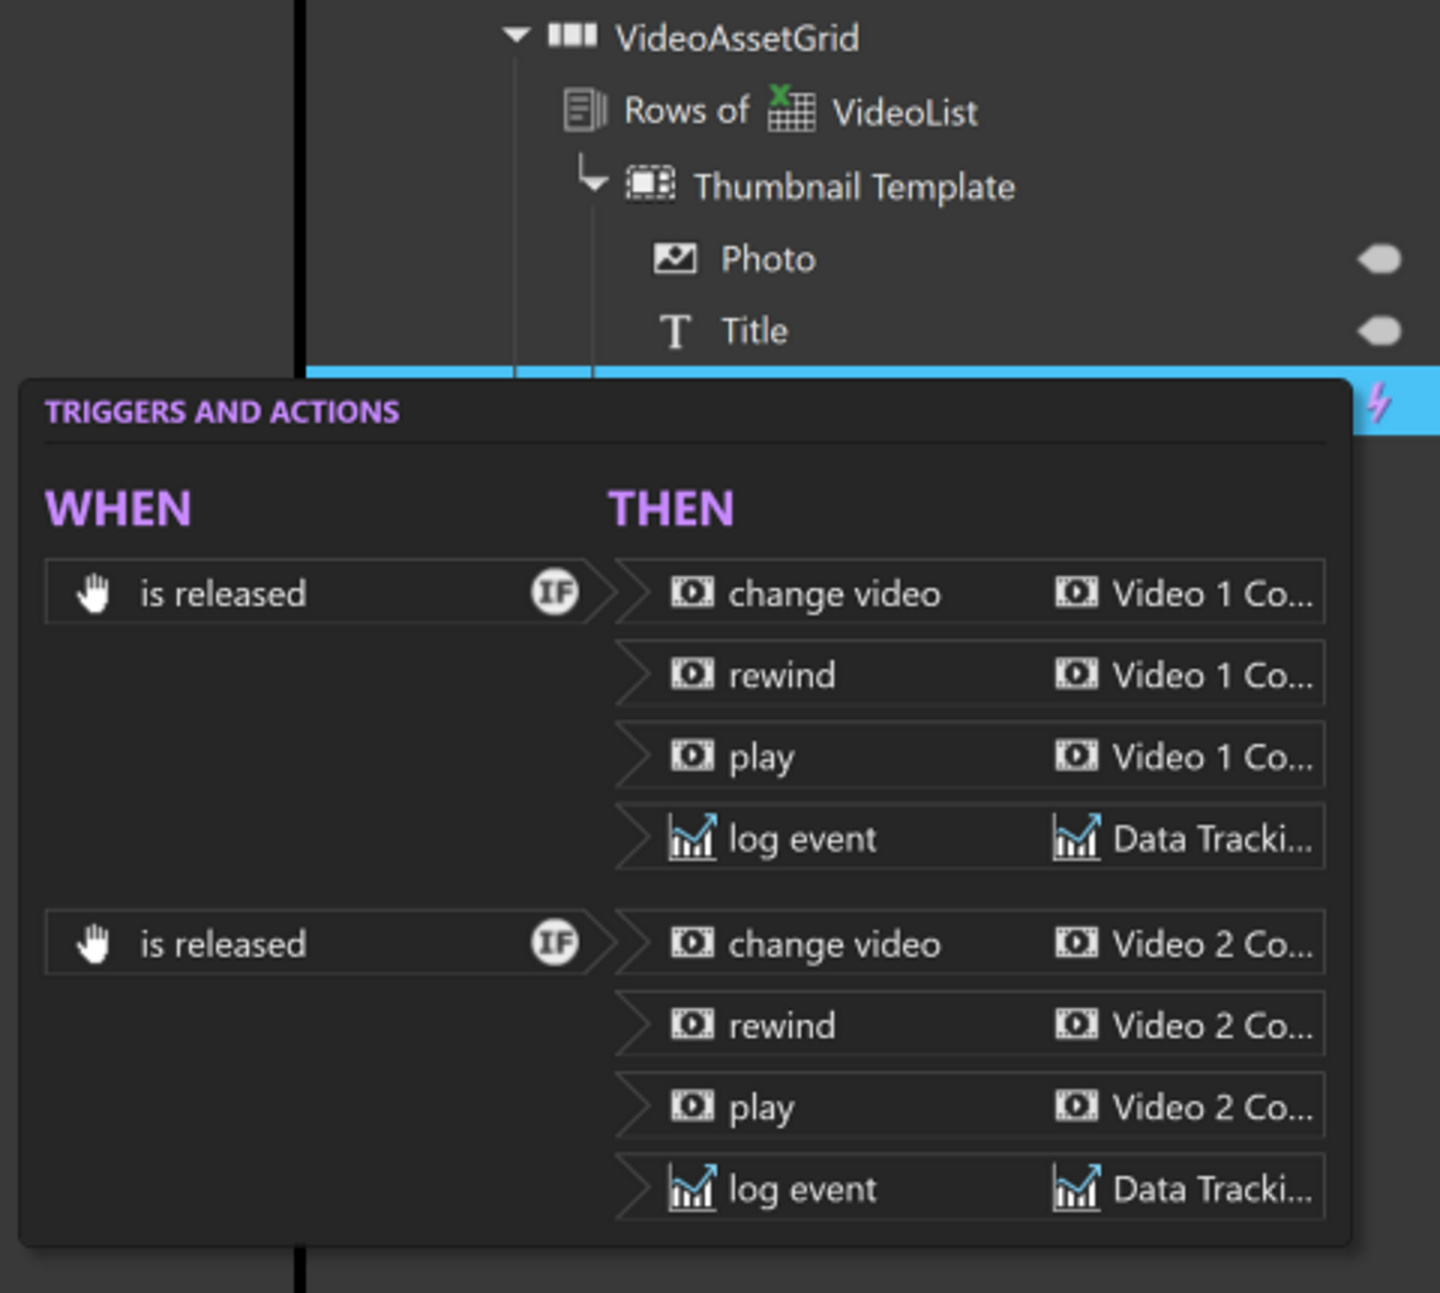
The conditions look to see if the toggle button, named ‘V2PlayingToggle’ is checked (or not) to determine whether to load the video into the ‘Video 1 Container’ or the ‘Video 2 Container’.
- If the ‘V2PlayingToggle’ ‘is checked’ attribute is True - load the new video into the ‘Video 1 Container’.
- If the ‘V2PlayingToggle’ ‘is checked’ attribute is False - load the new video into the ‘Video 2 Container’
Now that we have the newly selected video loaded into the appropriate container - it’s time to change the transparency of the other video container and reposition it (in the z axis, stacking order) behind the video we just selected to start playing, once the other has faded out completely!
I accomplished this by adding the following actions to both the Video 1 and Video 2 Containers.
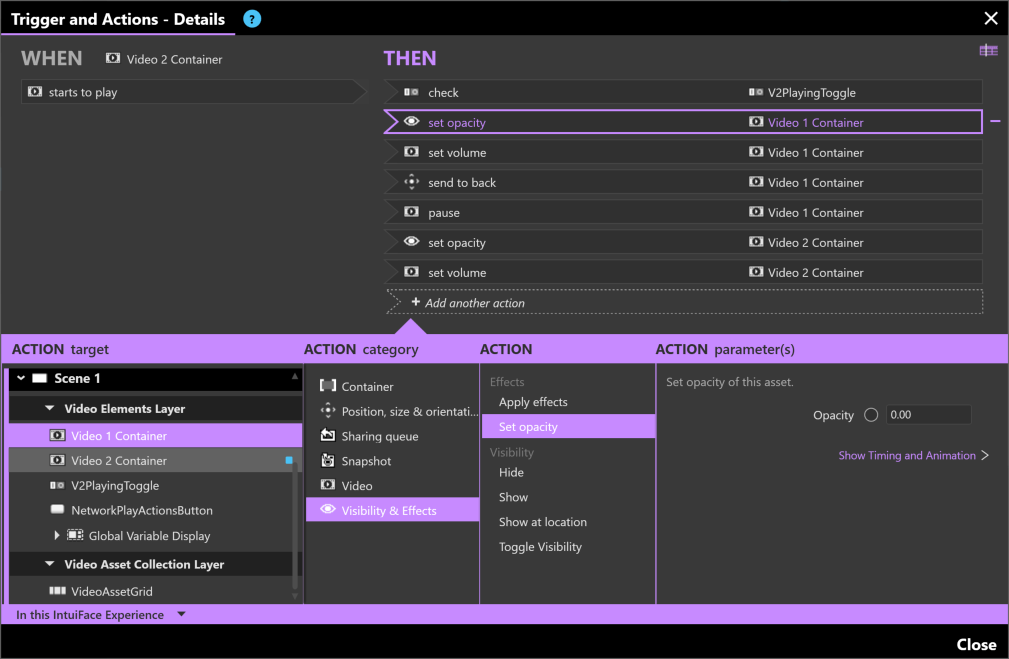
The image above shows the Triggers and Actions panel for the ‘Video 2 Container’. When the video inside the container starts to play, the opacity and volume properties are being changed for both video containers, while the pause and send to back properties are also being set for the ‘Video 1 Container’.
As these are the actions for the ‘Video 2 Container’ I am also setting the ‘V2PlayingToggle’ button to checked (True) because Video 2 has started to play.
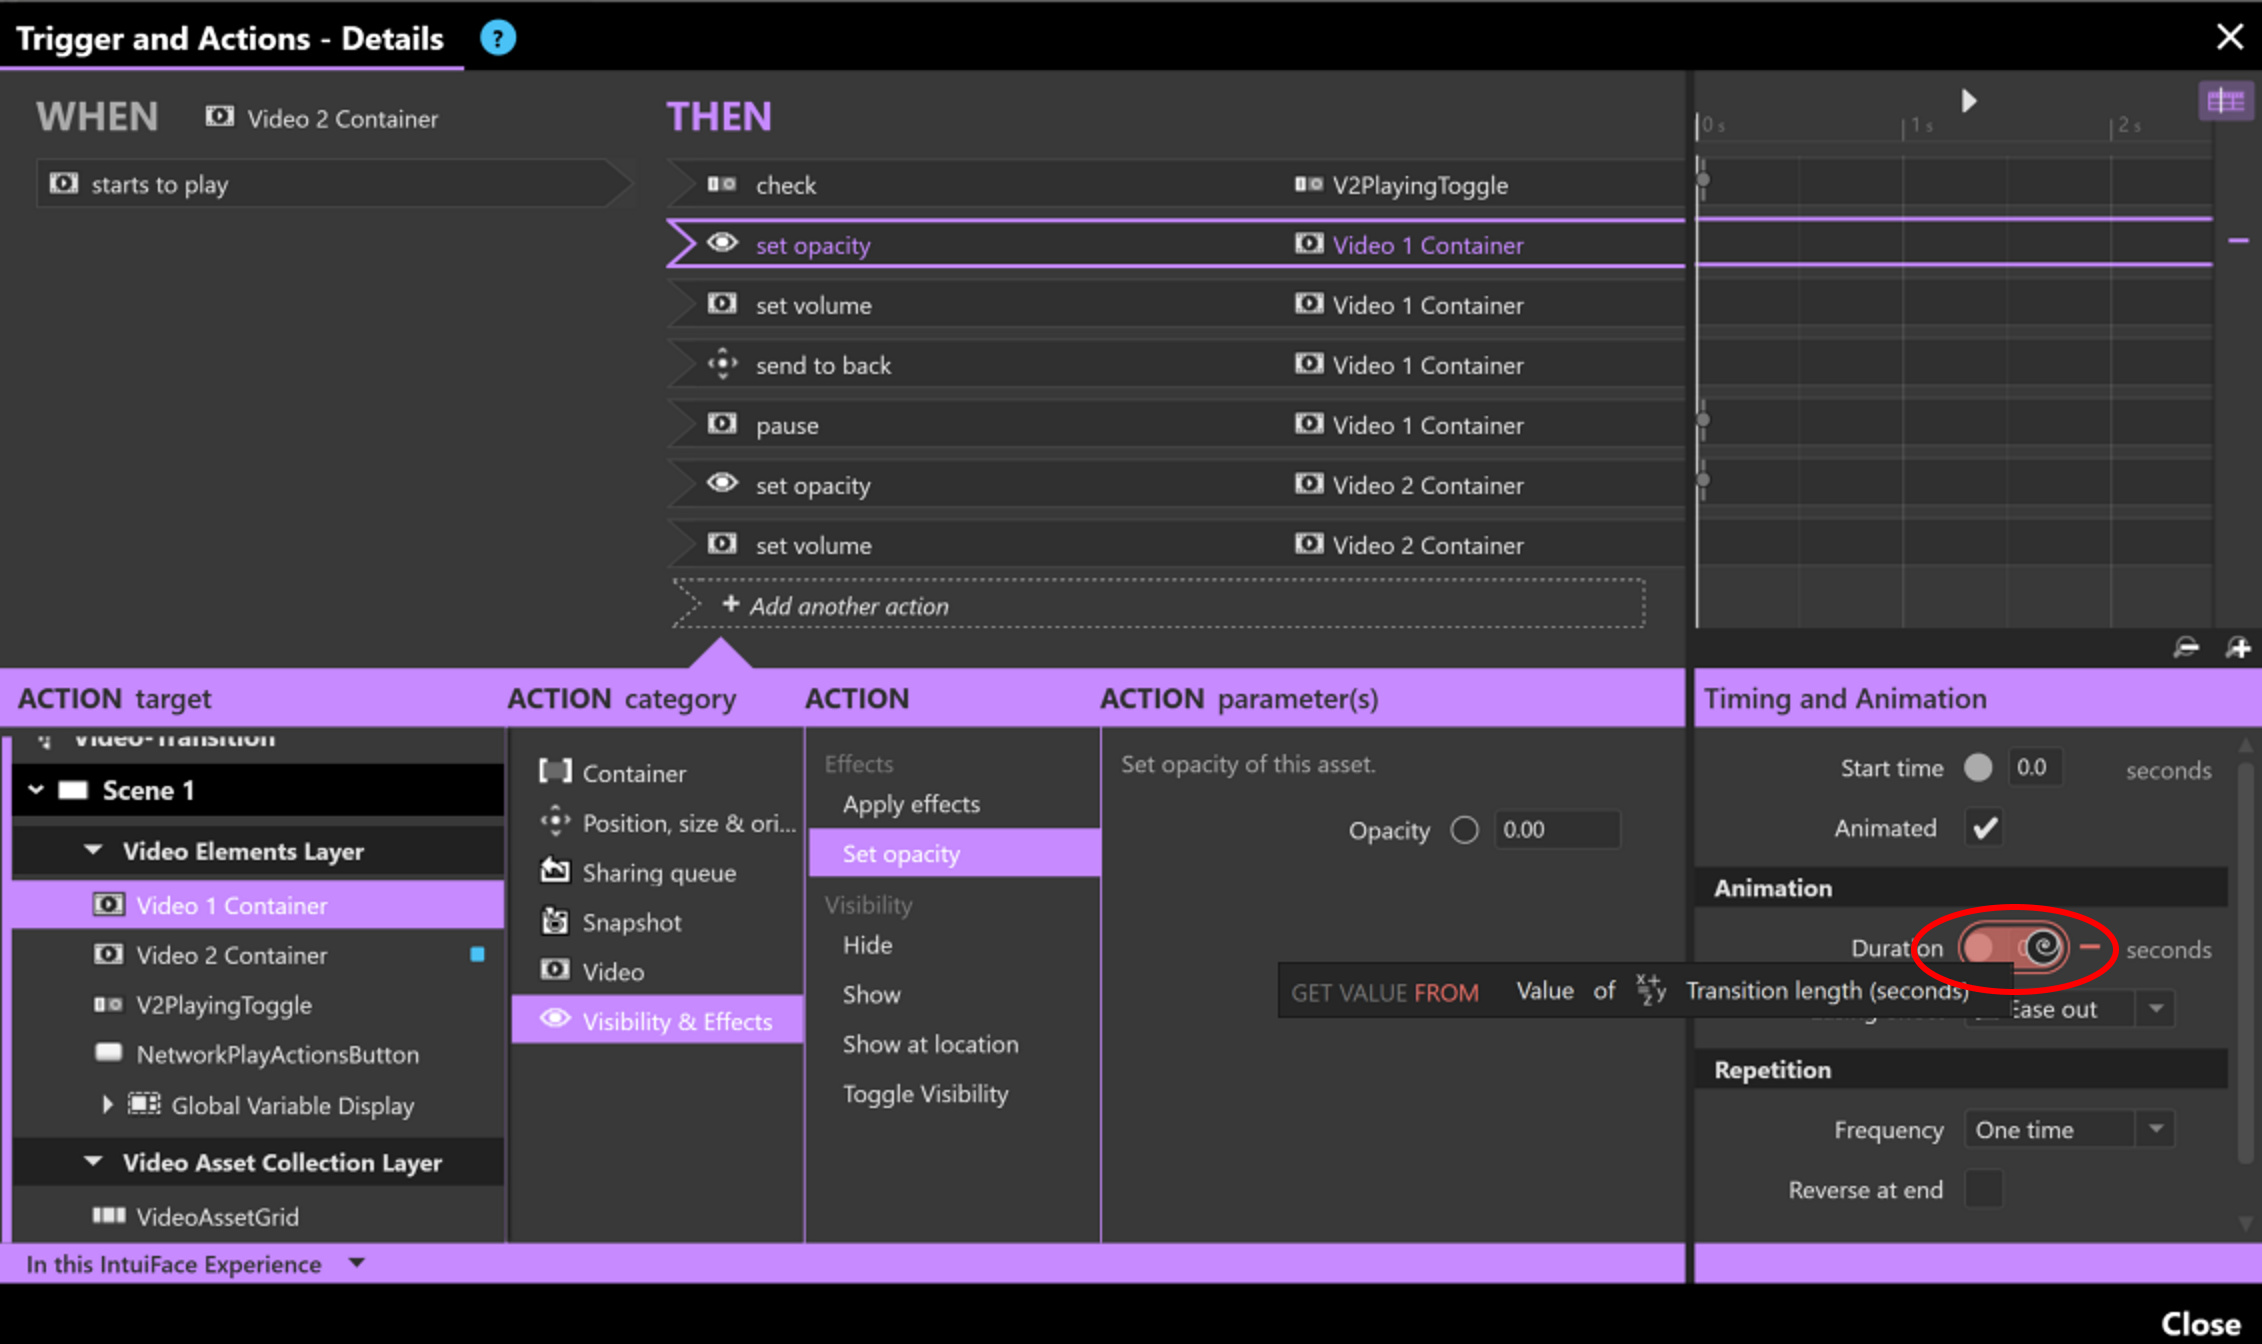
Additionally, in order to make this experience easier for other to use, I added a global variable that allows you to change the length of all the transitions in one simple setting.

The value of the global variable ‘Transition length (seconds)’ is being used by all the appropriate actions in the experience to set the opacity, volume, pause, and send to back attributes’ timing.
You can see this below, in the Timing and Animation section. The Duration value is being set by the global variable, ‘Transition length (seconds)’.
Below is a video of the Cross Fade Experience running full screen in Player, while the Remote Control Experience runs on a separate computer. Each time a new video is selected, a smooth, cross fade transition occurs!
Bonus! Remote Control
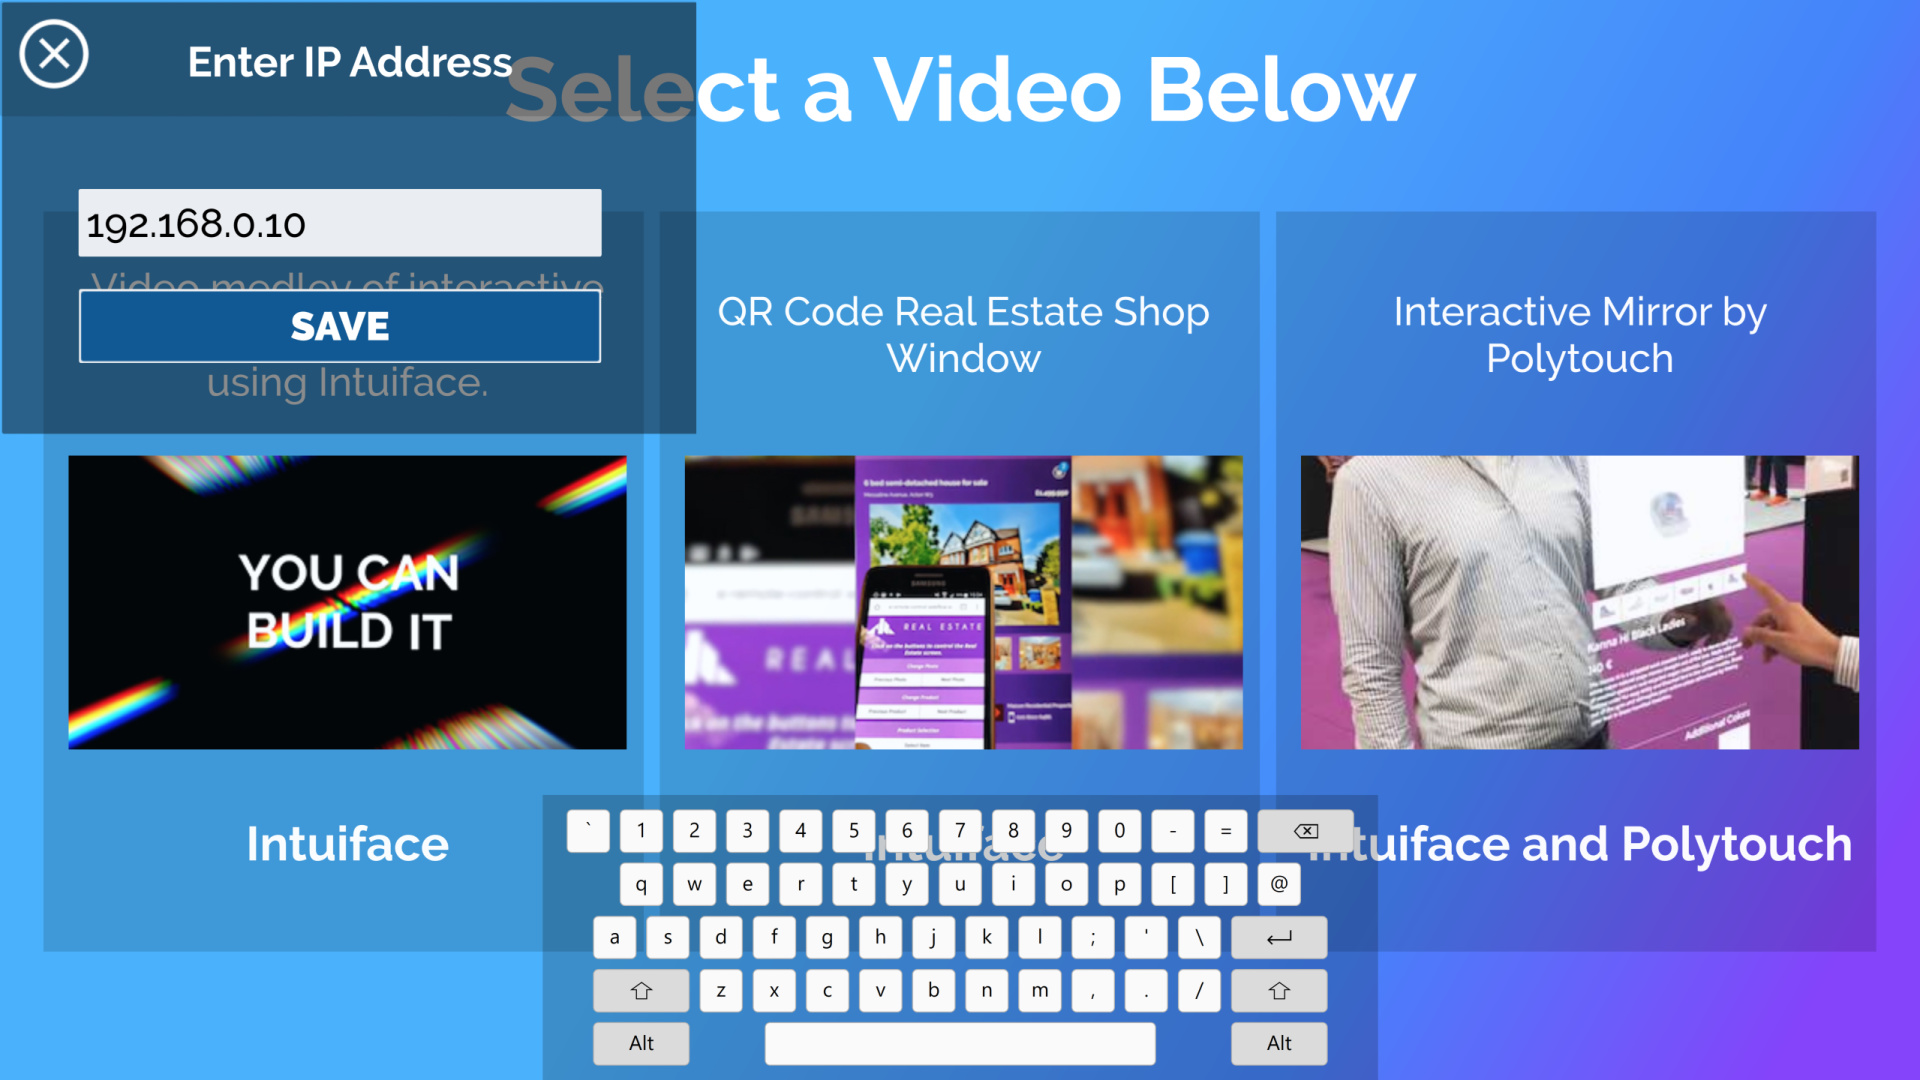
In order to control these videos from a remote machine, we have created a second experience. It uses the same Excel spreadsheet data as the Cross Fade Experience to generate the menu.
The experience also utilizes:
- Another Excel Interface Asset to save the IP Address entered
- The Call URL action to communicate with Cross Fade Experience
- A global variable to store the format of the URL needed
- An instance of the text manipulation interface asset to replace the parameters in the URL
The only thing you’ll need is the IP address of the Windows machine running the video transitions experience. If you enter the IP address into the field provided, you are set. If the Remote Actions are enabled on the target machine, there’s nothing else to configure.
The remote playback is accomplished by using the Call URL action to communicate with the Local Network Triggers Interface Asset that is set up in the Video Transitions experience.
When a user clicks on one of the video buttons in the Remote Control Experience, we send a message containing the video’s filename to the IP Address currently entered in the text field.
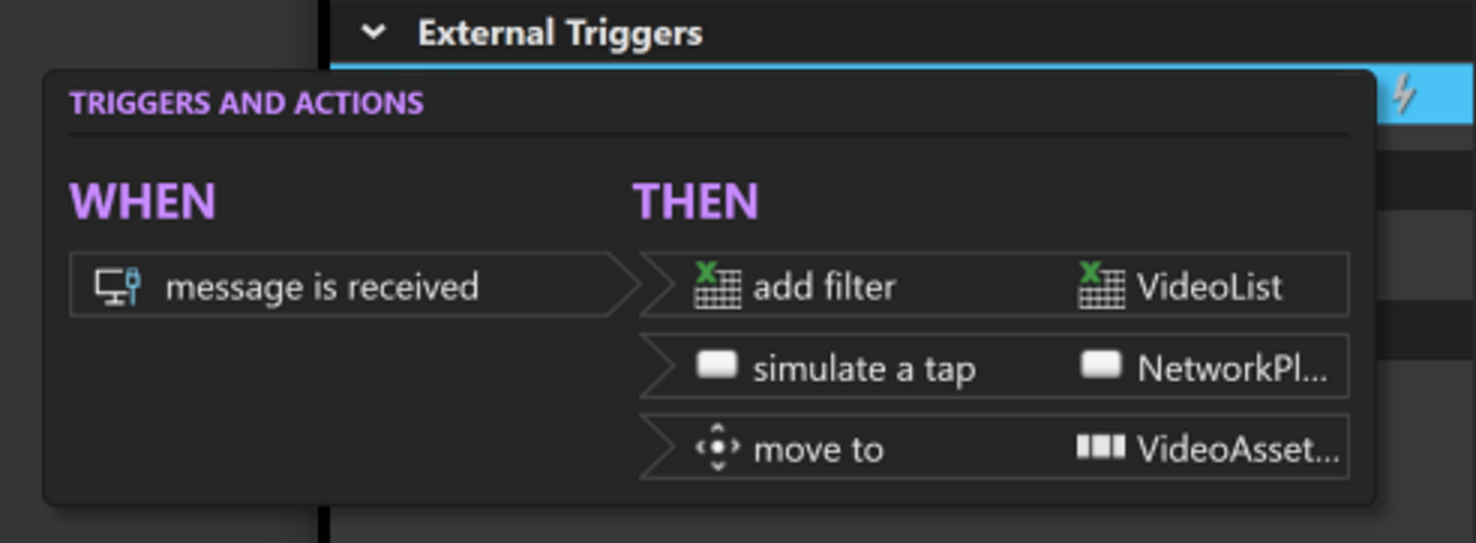
Back in the Cross Fade Experience, the same actions that were set up on the buttons in the video list are also present on the ‘NetworkPlayActionButton’. Once the message is received, we filter the video list to make sure we are playing the correct video, we simulate a tap on the ‘NetworkPlayActionButton’ and, finally we move the list of videos offscreen. Now that we have a remote control with all our video options displayed, we’re not going to need to see the same list in two, separate places!
Hopefully, with the help of these files, you will be able to easily integrate a video cross fade, call URL, and local network trigger actions into your own Intuiface projects! Please feel free to ask any questions you may have about these experiences in the thread below.
Enjoy those smooth transitions!
Thank you,
–Josh
