I have a very simple scenario about passive digital project. I’m talking about a trade center that have 10 or 15 displays that plays adverts (images and videos) from the tenants of the mall. My mission is to manage what resource when should play from date to date. I’m curious how can I do that with Intuiface. I read about Excel or Airtable integration, tried to set up the scheduler asset but I can’t figure it out how exactly I should prepare the template. Here is the scenario:
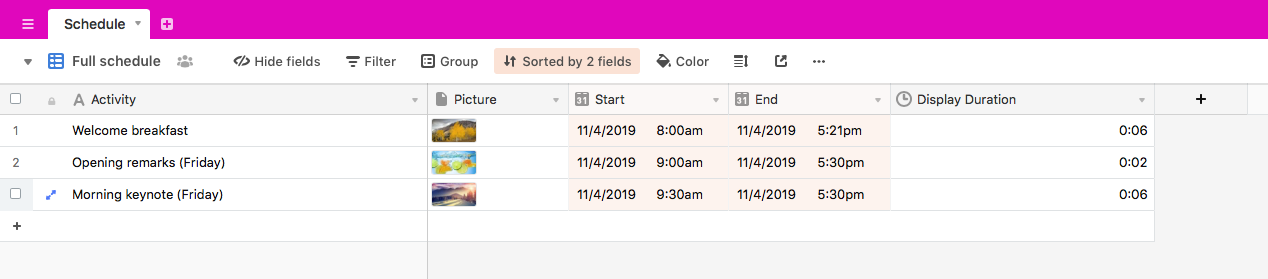
The customer needs are just to play a images and videos on full screen. This resources comes from their tenants. Every day they comes new resources and their durations are different. For example, today I’ve received image from “tenant A” that should play from 5 nov 2019 until 31 dec 2019. Tomorrow I’ll receive a 5 images from “tenant B” with duration from 15 nov 2019 until 1 feb 2020 etc. Also I need to set the duration of displaying of each resource because sometimes the adverts are simple and clear to understand images but sometimes the images contains many and small texts and I should put longer duration for them to make reading them possible. All of this resources should be play like auto scroll asset on full screen. Another inconvenience is that sometimes the expiration of a resource takes place over the weekend, so I need to adjust this shift from the previous day! I prefer to find a way who can help me to upload just the new resources and set their duration without need to change anything in composer and that’s way I’ve made this data base in Airtable:
About your questions, that’s a fairly wide topic but to make it short, yes, it’s doable and you approached it the right way
I recommend you to check the free sample QSR Menu Board from our Marketplace which displays menus based on the hour of the day. These menus (and images) are stored in Airtable. I also recommend you to read the associated article that fully explains how it’s built.
Thank you guys!
I need more leads about filtering in the Composer. Should I do that with buttons and simulate tapping them like you did in [QSR Menu Board]?
In QSR Menu Board, we added the button just for sample purpose, so our user can see instantaneously how it behaves by pressing it.
Actually, the change of menu is also effective based on the hour if you don’t use the button, Breakfast will be displayed in the morning between 6 and 11, and the Lunch between 11 and 23 (as you can see here on database).
You don’t need a button, you can have your triggers/actions based on the clock and show/hide element according to what you planed, as shown on @Seb’s sample above.
I did it by creating a trigger on my auto scroll layer that says: WHEN–timer has elapsed 1 sec–THEN–set filterByFormula–{Live}=“False”.
Also I turned on automatic refresh option to make the content up to date. Now it seems to be working fine.
Did I do it right?
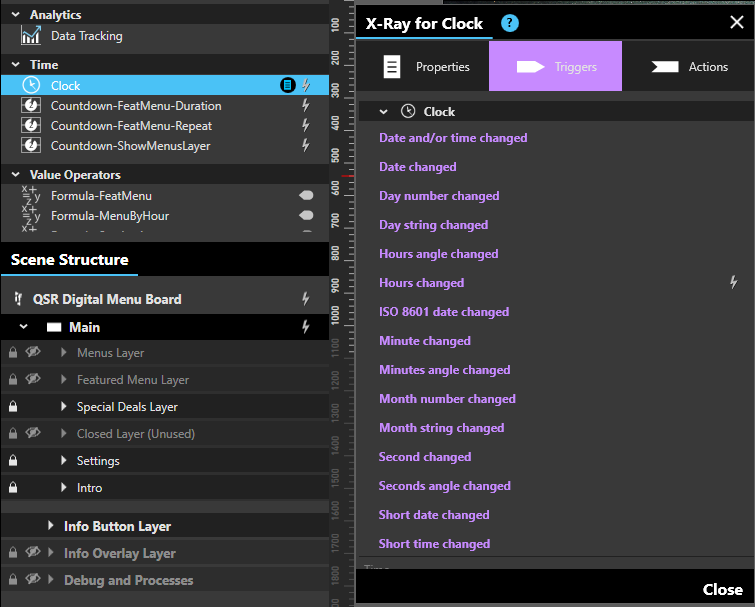
It’s not the best way to do it, I recommend the one implemented in the 2 samples above, which are using the Clock Interface Asset.
By adding the Clock to your scene, you will have access to your local time on the device running the experience and you will be able to use plenty handy triggers based on time.
Now you can refresh your request based on the hour for instance, like: WHEN Hours changed THEN Refresh airtable request
It’s simpler, more obvious to read and better performance wise as you will only refresh the request when you need and not every second.
Also note that as soon as you modify a parameter on a GET request, it’s fired automatically for update. So, with what you have currently implemented:
request is sent every 1 second because of the parameter filterByFormula change
request is sent every X time because you’ve set some automatic refresh
Finally, you may want to double check if it works, because to my knowledge, filterByFormula-{Live} isn’t a valid query parameter for Airtable, the proper syntax is filterByFormula as shown here.
Thank you, Alex!
But now I found that I couldn’t use video files between the rows with images. In my scenario like I said, videos and images is needed in the same time. Another thing I noticed is that the API Explorer randomize the set. The items are sorted by ID, that I can’t change. The slider should follow the right order set in Airtable.
add a column “mediatype” in your Airtable for each media with value “image” or “video”
add both an Image Asset and a Video Asset in your experience
based on the value of “mediatype”, show or hide the proper asset, using a binding on the visibility property pf each Asset and a custom converter that will return "True or “False” based on the “mediatype” value (image/video)
The “lazy” trick: instead of having a single column “mediatype” and a custom converter with javascript, you can have 2 columns “isImage” and “isVideo” with values “True” or “False” and do a direct binding to Asset Visibility.
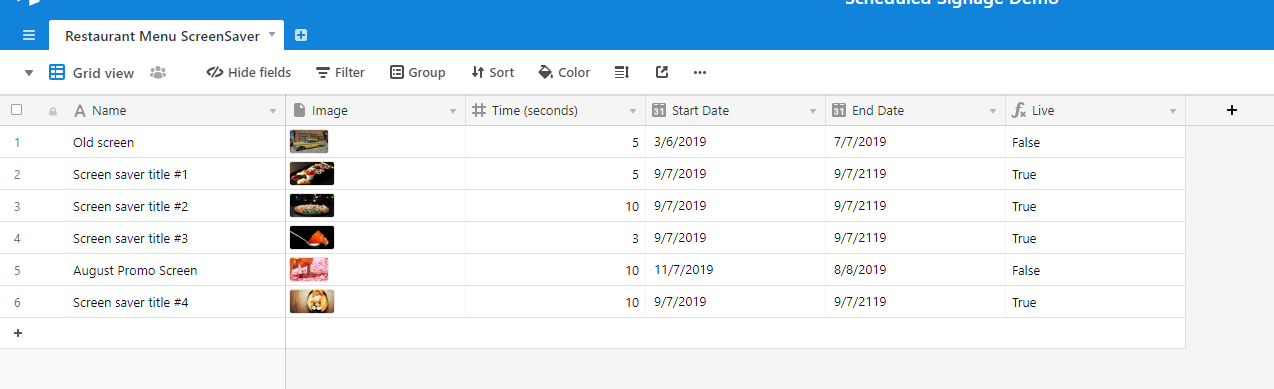
sort the items the way you want in Airtable for the view you are using
In the sample below, the view is named “Grid view” (on the left), you can apply filtering and sorting to it (on the right).