Hi everybody,
In order to achieve what mentioned above
First, install imagemagick, grab it here: ImageMagick – Download
I installed the ImageMagick-7.0.9-5-Q16-x64-static.exe
I wrote down the directory where the command line is located, for me it’s:
C:\Program Files\ImageMagick\magick.exe
(we’ll use it later)
Now, the command to use to compress, for instance to jpg, will be:
magick convert -strip -interlace Plane -sampling-factor 4:2:0 -quality 85% "path_to_source_image" "path_to_destination_image"
What’s left is fairly simple (it’s Intuiface) ![]()
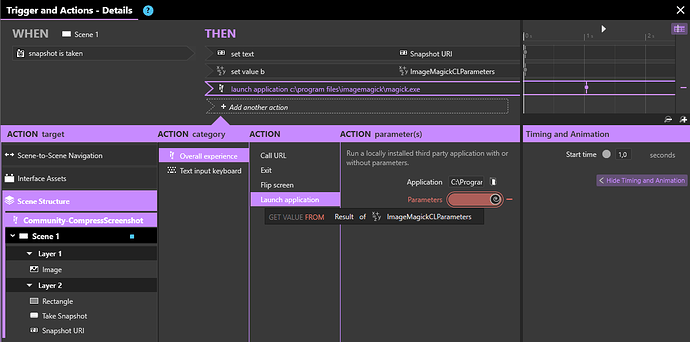
We’re going to set up a a trigger/action when a snapshot is taken that is building parameter list for the command line and executing it.
For the source, we use a binding on the URI of the freshly taken snapshot, for the destination, provide what suits you.
(side-note: to build the parameter complete line, as I’m lazy and standard concatenating isn’t handy when you have more than two value, I used a “superconcat” IA that you can find in our last Nexmosphere sample, and now in this one)
Compress results:
Before
After

![]() From 2.5Mb .png to 235Kb .jpg in one click!
From 2.5Mb .png to 235Kb .jpg in one click! ![]()
Here is the sample I used to do that (don’t forget to install ImageMagick!).
Community-CompressScreenshot.zip (9.5 MB)

