Hi Intuifacers!
Today we’re going to see how you can customize your Map Collections using Mapbox Studio and your own personal style in Intuiface.
Registering a Mapbox account
A quick reminder: you need a Mapbox account in order to proceed. Check out our dedicated Map Collection article in the Help Center, explaining how it’s done.
Enjoy and don’t hesitate. It’s free! ![]()
Creating your style
Once you’ve created your account, head to Mapbox Studio.

Here you will find all the styles you’re going to create for your maps.
Click the [New Style] button in the top right. This will open a new window:
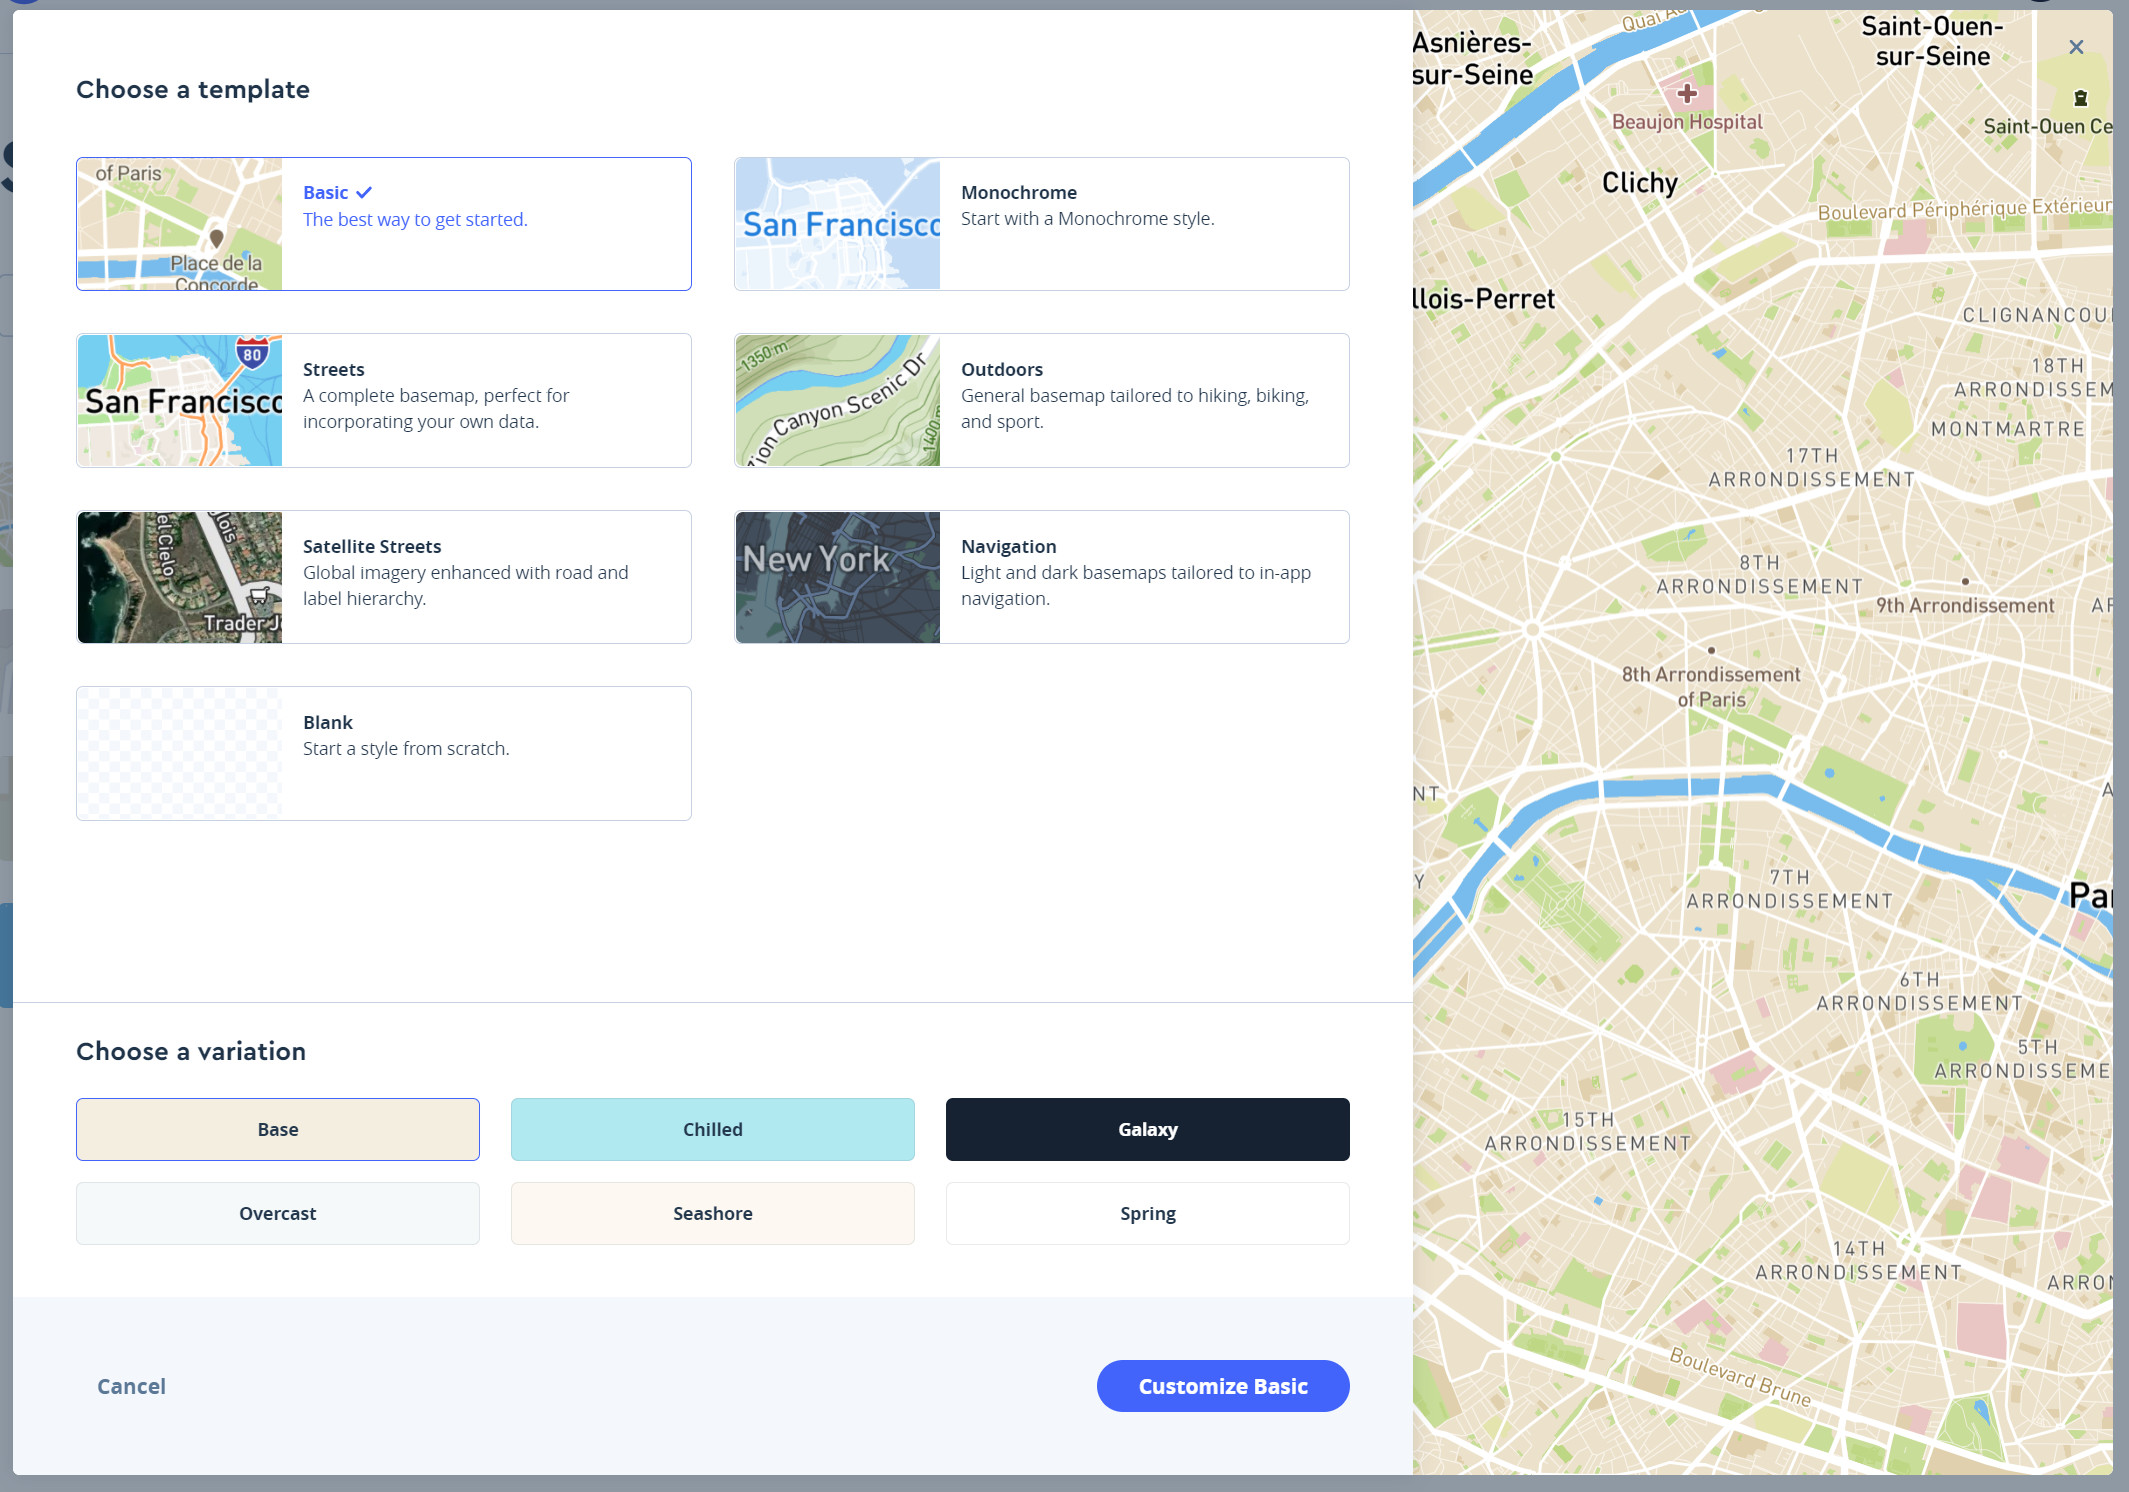
Mapbox offers you a list of prebuilt templates, each with some variation options (at the bottom). You can also start with a Blank template.
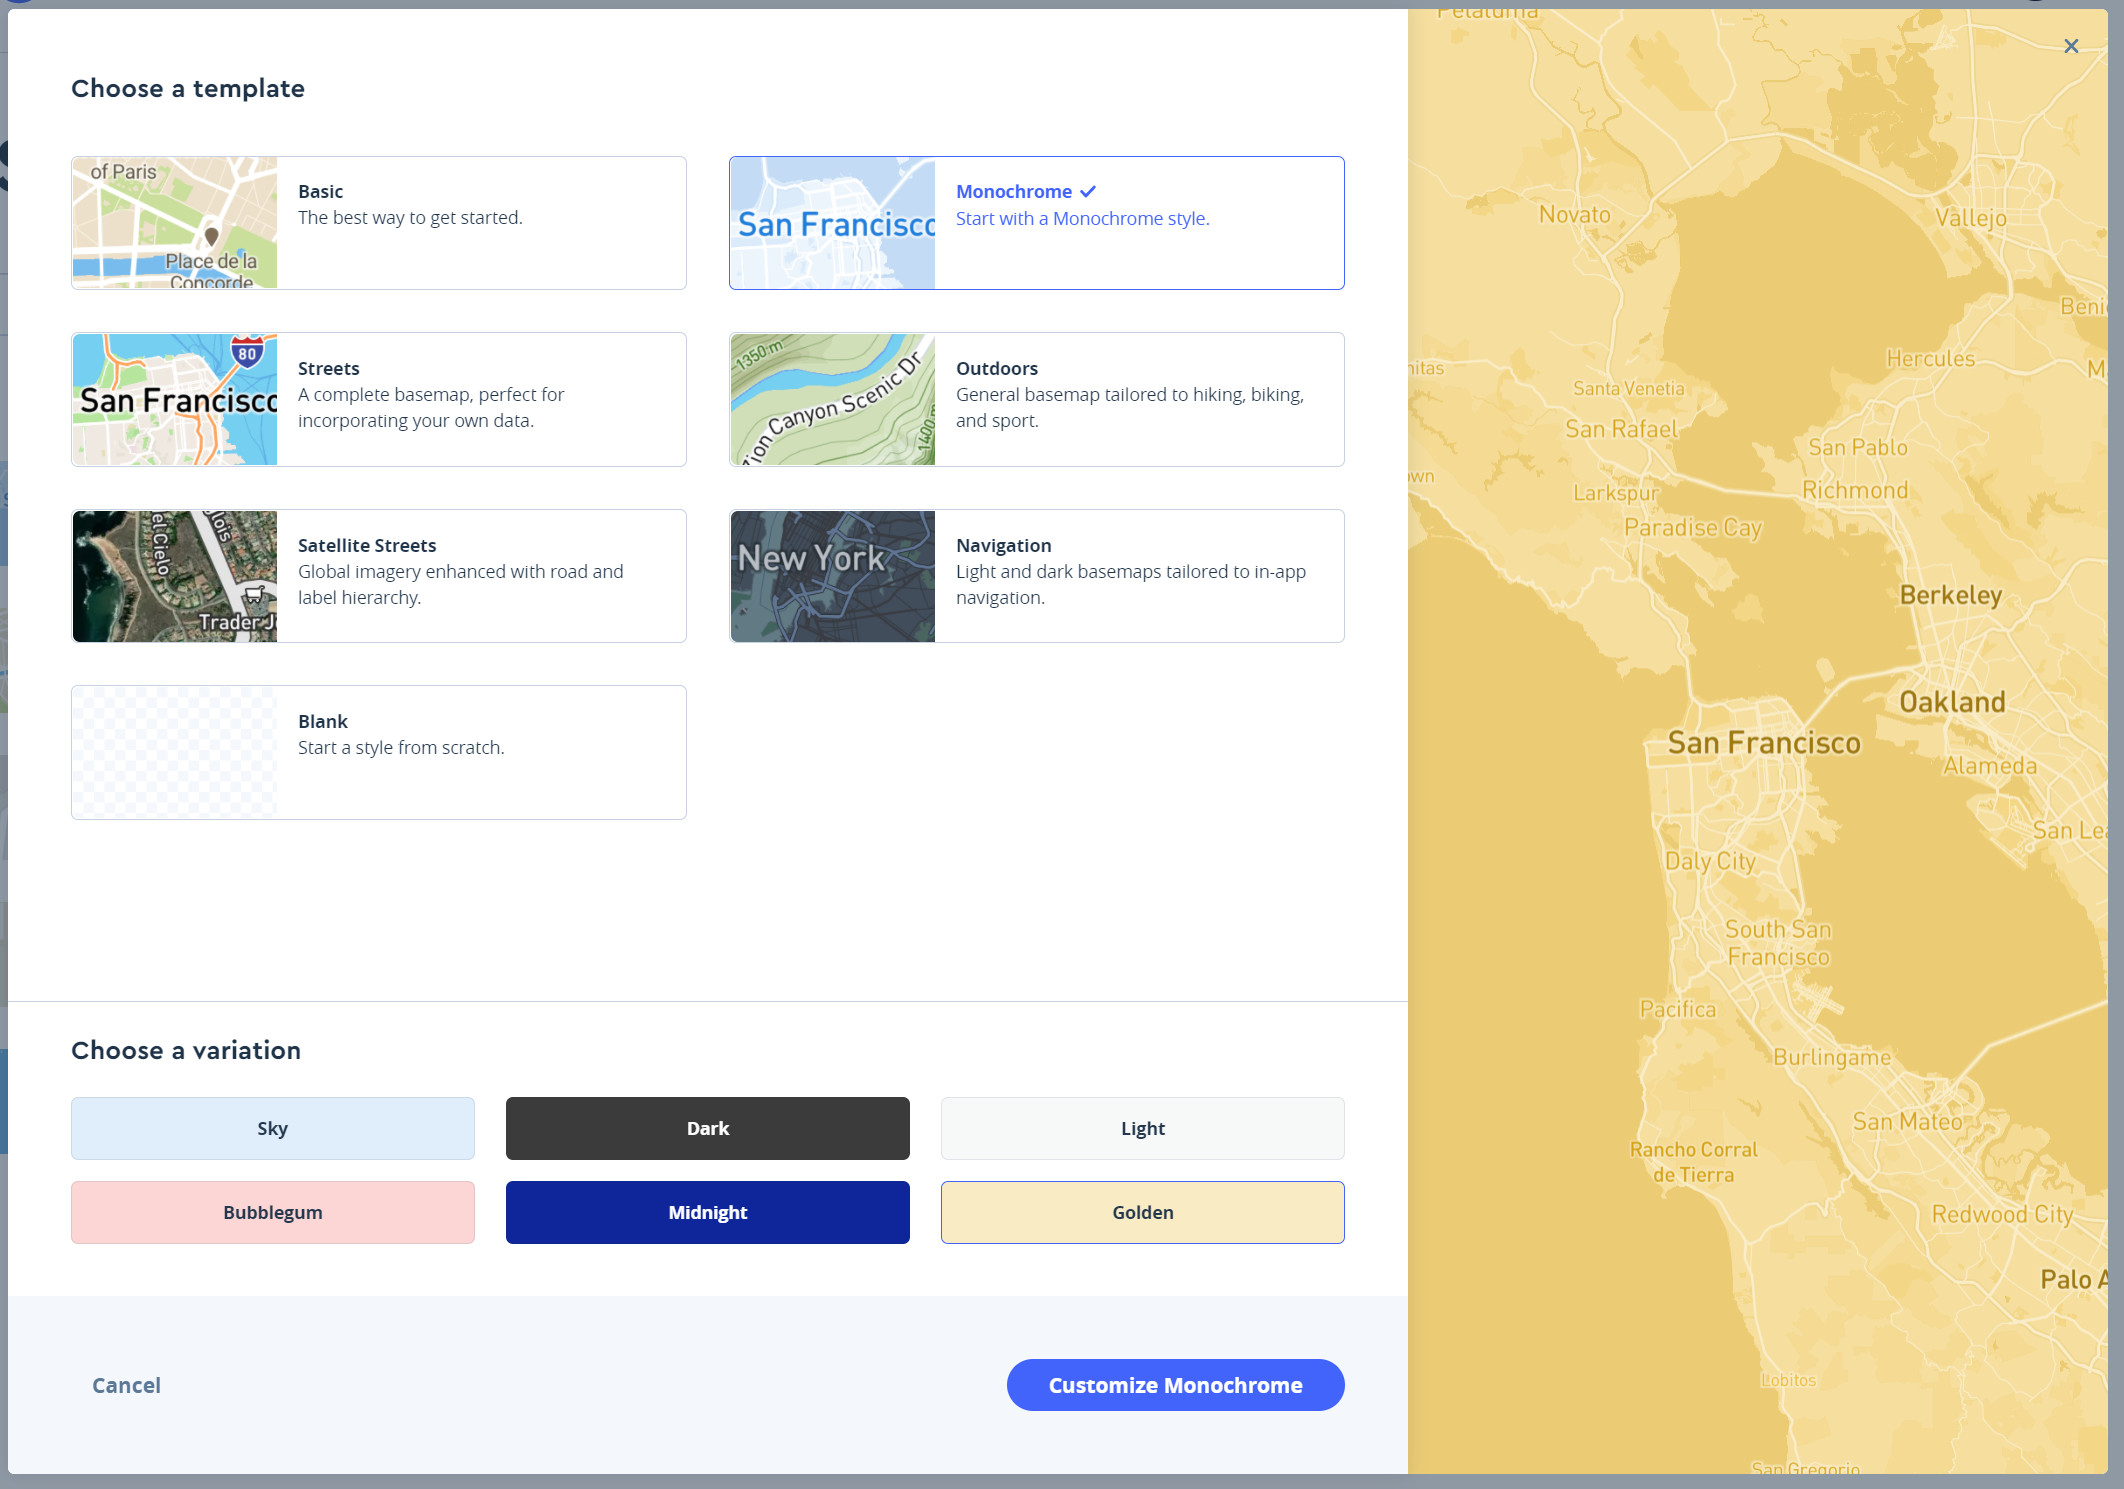
Let’s pick the Monochrome+Gold variation. Notice how you can preview the map on the right-hand side. Click the [Customize Monochrome] button.
This will bring you to the Studio itself.
Here you will be able to customize almost everything, from colors to font to deciding what you want to display or not.
Recommendation: On the top left, rename your Style to something relevant for you or it will have the same name as your Template. I renamed mine to “Old Scroll”.

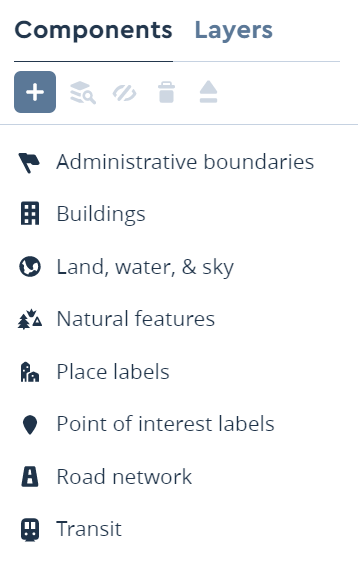
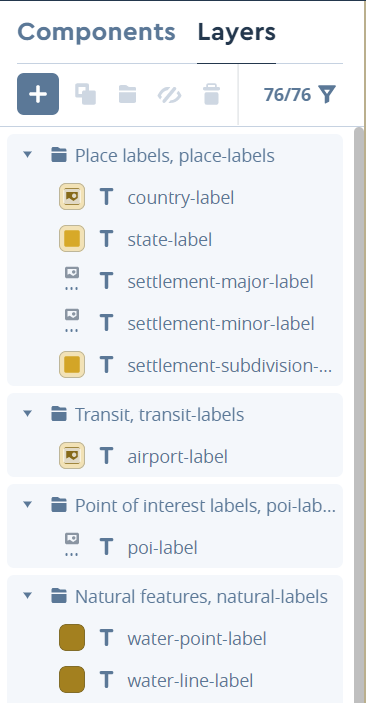
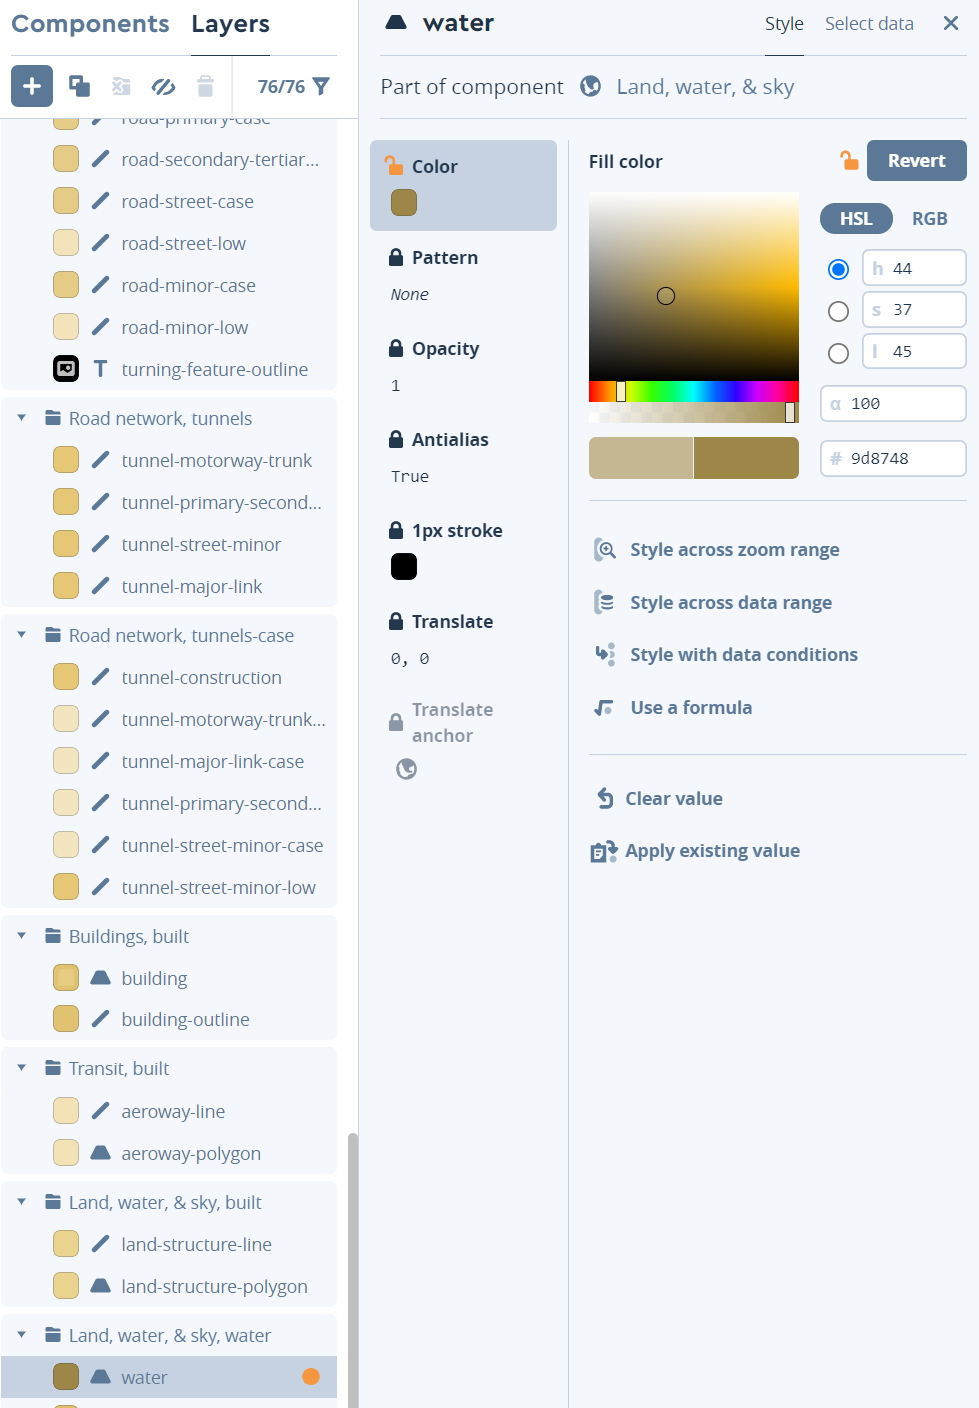
In the left-hand menu, you can customize Components at a “macro” level or fine-tune a Layer.
The possibilities are infinite and only limited by your creativity and time ![]()
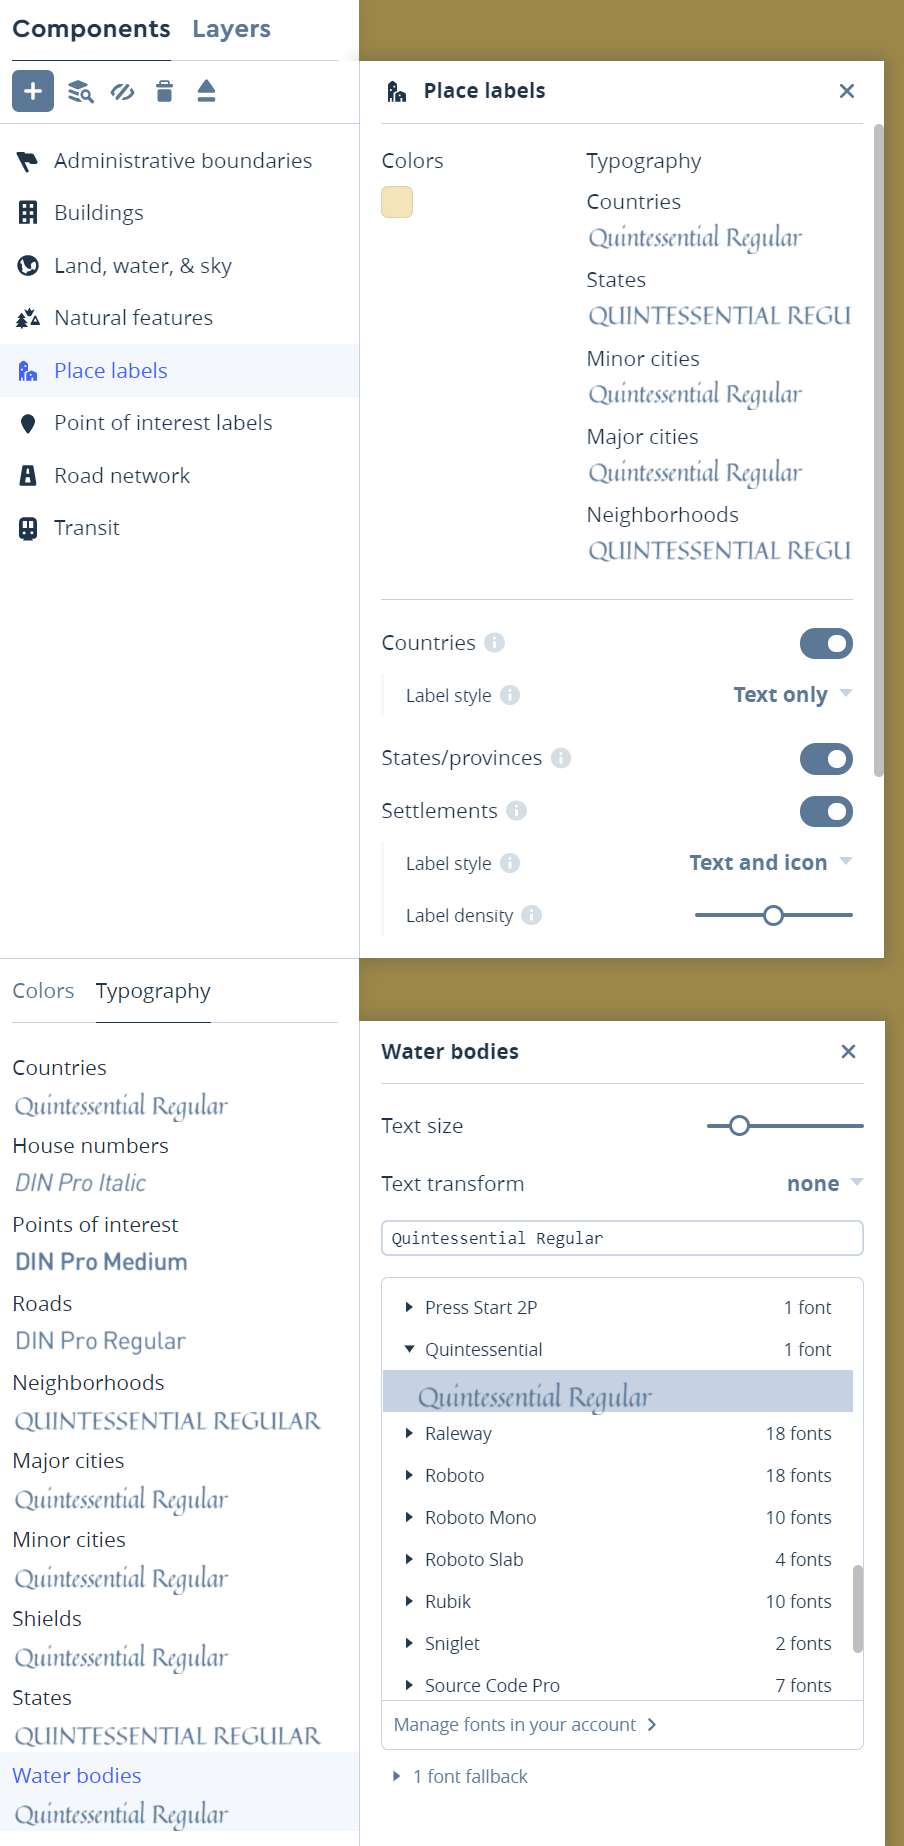
For instance, in Components, I changed the font to something more “piratish”! ![]()
… and in Layers, I changed the water layer color to something darker.
Publish your creation
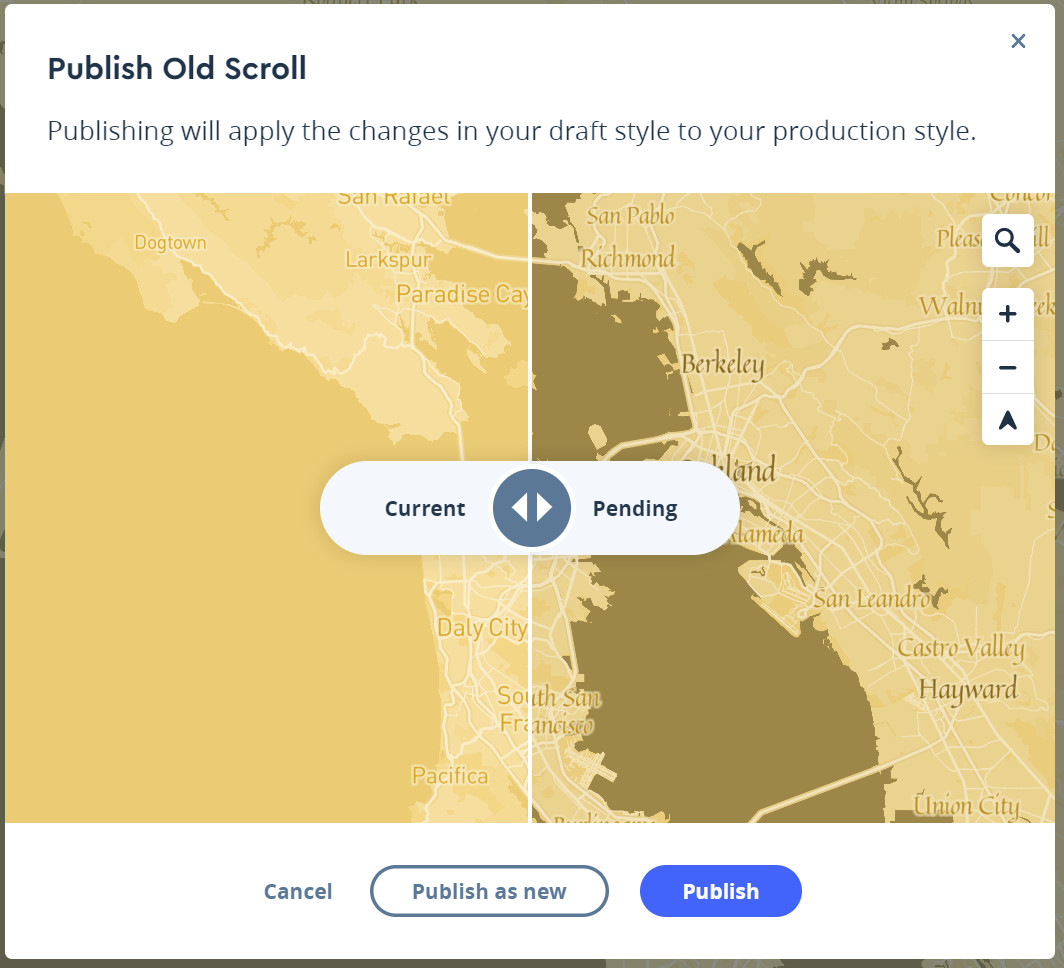
Once you’ve made your modifications, notice how the Publish button in the upper right-hand corner is enabled. Click it.

After a quick preview, you will be asked to confirm your Publish. Just press the appropriate button.
Now your list has been updated and your new Style will appear on top.
Click the vertical 3 dots icon found at the end of the row for your new style to reveal options.

Here you will find your Style URL. Press the button to copy it into your clipboard. That’s what we’re going to use in Composer.
For instance, the Style URL I just created looks like this:
mapbox://styles/alexiscamacho/ckpfm8qnc1czj17qq06nc1ywm
And as I made it public via the menu mentioned previously, you should be able to use it in Composer too.
Use your freshly created Style in Composer
Add a Map Asset to your scene.
In Map Properties, under “Style URL”, paste in the URL you grabbed in the step above
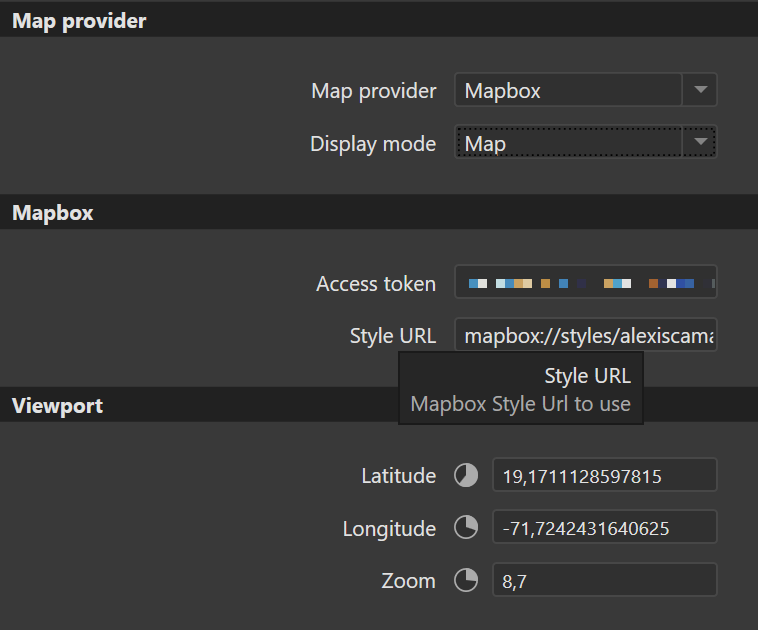
Then add your Access Token (you can find it here) to get rid of the Map Collection warning message.
Voilà, here’s your new map with a custom style!

If you want your “Old Scroll” map feel even more Pirate ![]() , head to:
, head to:
- Latitude 19.1711128597815
- Longitude -71.7242431640625
- Zoom 8.7
(just between you and me, there is treasure buried on Tortuga Island, to the northwest ![]() )
)